


Tutorial written by and © to Bits N Bobs 6th July 2021.
Results are for personal use only.
No monetry gain allowed and that includes placing them behind a paid or donation based membership area.
You are not allowed to share/forward or translate any of my tutorials or place them on any blog, website, DVD or anywhere else without my permission.
These tutorials are written from my own ideas and any similarities to any other tutorial is purely coincidental.
All tutorials are for those with a working knowledge of paintshop pro.
I reserve the right to amend these terms at any time.
Supplies needed.
Download my supplies HERE including the mask
Font of choice for your name.
I am using Rage Italic from FontsGeek here
Tube of choice.
I am using Marie is coming by Jenny here
Tube is not to be used without the correct licence.
Mask of choice
I am using mask Christmas 5 by Essex girl (in the supply zip)
Note
This tutorial was written in PSP 9.
Double click on your font and minimize.
Open all other supplies in paintshop.
Open a new image 650 wide X 650 high at 72 dpi
1. Selections/ select all, Selections/ modify,
Selections/ modify contract by 30.
Copy your tube, paste into selection.
Effects/ Dsb flux/ Central mirror, Mirrors 9, Rotation 147
Selections/ modify/ expand by 15.
Layers/ new raster layer.
Flood fill with a colour from your tube.
I have chosen #1d5837
Layers/ arrange/ move down.
Selections/ select none.
Layers/ new mask layer/ from image and select your mask.
Layers/ merge/merge group/ merge visible

Activate your filtered tube layer and change the blend mode to lighten.
Lower the layer opacity to 75%
2. Copy and paste your tube as a new layer.
Position to your liking, mine is on the right hand side.
Add a drop shadow.
I am using...
V 3 - H 3 - O 80 - B 7 - Colour #000000
3. Activate your filtered tube layer,
Copy the fireplace, paster as a new layer.
Position up and to the left slightly.
Add the same drop shadow as before.
Copy Noel element, paste as a new layer.
Layers / resize to 41%, position on the to of the fireplace.
Add the same drop shadow as before.
4. Layers/ new raster layer.
Add your copyright info and name
export and save in your chosen format.
I use a transparent png.
5. For your avatar open a new image,
180 x 180 at 72 dpi.
Copy your tag, paste as a new layer.
Position to your liking.
Layers/ merge/ merge visible.
Add your copyright info, initial and then save.


Wonder of Alice
Tutorial written by and © to Bits N Bobs 3rd July 2021.
Results are for personal use only.
No monetry gain allowed and that includes placing them behind a paid or donation based membership area.
You are not allowed to share/forward or translate any of my tutorials or place them on any blog, website, DVD or anywhere else without my permission.
These tutorials are written from my own ideas and any similarities to any other tutorial is purely coincidental.
All tutorials are for those with a working knowledge of paintshop pro.
I reserve the right to amend these terms at any time.
Supplies needed.
Font of choice for your name.
I am using Alice in Wonderland from Dafont HERE
Tube of choice.
I am using Alice in Wonderland by Dilara HERE
Tube is not to be used without the correct licence.
Scrap kit Alice by Wicked Diablo HERE
Items I have used are...
Elements 6, 7, 8, 20, 47, 48, 52, 59, 60,
Paper 1
Mask of choice
I am using cornered octagon by Essex Girl My supplies download HERE
Wording in the same zip file as the mask.
Note
This tutorial was written in PSP 9.
Double click on your font and minimize.
Open all other supplies in paintshop.
Remember to save your work regularly so you don't lose it.
Open a new image 650 wide X 650 high at 72 dpi
1. Selections/ select all.
Open your paper,
Copy, paste into selection, select none.
Close paper.
Layers/ new mask layer/ from image and select your mask.
Layers/ merge/merge group/ merge visible

2. Copy E7, paste as a new layer.
Image/ resize 75% position in the middle.
Add a drop shadow.
I am using...
V 3 - H 3 - O 80 - B 7 - Colour #000000
Copy your chosen tube and paste as a new layer.
Image/ resize 21% (all layers untabbed always)
position towards the bottom right hand side.
Add the same drop shadow as before.
Copy E20, paste as a new layer.
Image/ resize 29% and position so it looks like Alice is leaning on it.
Add the same drop shadow as before.
3. Now to add some more elements.
This is the longest part.
Copy E59, paste as a new layer.
Image/mirror, Image/ resize 19%
Position on top of the mushroom on the left of Alice.
Add the same drop shadow as before.
Copy E60, paste as a new layer.
Image/ resize 23%
Position to the left so i'ts pouring into the cup.
Add the same drop shadow as before.
Copy E6, paste as a new layer.
Image/mirror, Image/ resize 45%
Position to the left bottom corner.
Add the same drop shadow as before.
Copy E48, paste as a new layer.
Image/ resize 25%
Position to the right so it looks like it is coming out
of Alice's pocket and being held by the caterpillar.
Add the same drop shadow as before.

Copy E52, paste as a new layer.
Image/ resize 21%
Position to the right and layers/ arrange/ move down
until it is below the tube layer and position behind
the caterpillar.
Add the same drop shadow as before.
Copy E47, paste as a new layer.
Image/ resize 21%
Position ontop of the mushroom behind the teapot and cup
Add the same drop shadow as before.
Copy E8, paste as a new layer.
Image/ resize 27%
Position behind the rabbit.
Layers/ duplicate layer, Image/mirror.
Turn off your tube layer for this next part.
Move the right roses up slightly so it's not
in the keyhole of the book.
Turn your tube layer back on.
Right rose layer, Layers/ merge/ merge down.
Layers/ arrange/ move down X 2
Add the same drop shadow as before.
Copy E8 again, paste as a new layer.
Image/ resize 27%
Position towards the top left corner,
Layers/ duplicate layer, layers/ arrange/ move down X2.
Image/mirror layers/ merge/ merge down.
Add the same drop shadow as before.
5. Copy the wording file and paste as a new layer.
Position to your liking.
Mine is at the top center.
Layers/ properties, change the blend mode to Lighten.
DO NOT MERGE
6. Layers/ new raster layer.
Add your copyright info.
7. For your name.
Use font Alice in Wonderland, size 48 colour #f50203.
Layers/new raster layer.
Add your name, selections/modify/ expand by 3,
layers/new raster layer flood fill with white, #FFFFFF
Layers/ arrange/ move down.
Selections/modify/ expand by 1
layers/new raster layer flood fill with blue, #0058af
Layers/ arrange/ move down.
Selections/ select none.
Add the same drop shadow as before.
Active your red name layer,
Layers/ merge/ merge down X2
Layers/ properties, change the blend mode to Lighten.
Export and save in your chosen format.
I use a transparent png.
If you just want this tag you are finished.
If you want the set continue.
8. Open a new image,
600 x 250 at 72 dpi.
Now it is just a case of copying images from your main tag image
(remember you didn't merge it) and placing them wherever you want.
Here is mine.
9. Copy your top corner rose layer, paste as a new layer.
Posiotion to top left corner.
Layers/ duplicate/ duplpicate layer, Image/ mirror
Layers/ merge/ merge down. Layers/ duplicate, Image/ flip.
Layers/ merge/ merge down.
Add the same drop shadow as before.
Copy your rabbit layer, paste as a new layer.
Image/resize 65% position to the left.
Layers/ duplicate, Image/ mirror.
Copy Alice layer, paste as a new layer.
Image/resize 65% position to the left.
Copy your wording layer, paste as a new layer.
Position slightly towards the top center.
You want to be able to see the rabbit faces.
Activate your rabbit layer.
Copy your small cards, paste as a new layer.
Position in the center.
Copy your teacup, paste as a new layer.
Position towards the bottom.
Copy your teapot, paste as a new layer.
Position towards the bottom.
Now position your teacup and teapot so the are more central at the bottom.
Copy your cake layer, Image/ resize 39% position the the left of the teapot.
Layers/ duplicate, position to the right of the teacup.
10. Add your copyright info, add your name using
the same settings as step 7. then save as you did your tag.
11. For your avatar open a new image,
180 x 180 at 72 dpi.
Merge your first tag.
Copy your tag, paste as a new layer.
Position to your liking.
Layers/ merge/ merge visible.
Add your copyright info, add your initial using
the same settings as step 7. then save as you did your tag.
If you followed this whole tutorial thank you it took me forever to write it lol


Beautiful Mermaid
Tutorial written by and © to Bits N Bobs 1st July 2021.
Results are for personal use only.
No monetry gain allowed and that includes placing them behind a paid or donation based membership area.
You are not allowed to share/forward or translate any of my tutorials or place them on any blog, website, DVD or anywhere else without my permission.
These tutorials are written from my own ideas and any similarities to any other tutorial is purely coincidental.
All tutorials are for those with a working knowledge of paintshop pro.
I reserve the right to amend these terms at any time.
Supplies needed.
Font of choice for your name.
I am using Sun Sea Sand from Dafont
Tube of choice.
I am using Beautiful Mermaid by Alex Prihodko
Tube is not to be used without the correct licence.
Plugins
Graphnet plugins Funhouse available here
and DSB Flux available here
Note
This tutorial was written in PSP 9.
Double click on your font and minimize.
Open all other supplies in paintshop.
Open a new image 600 wide X 250 high at 72 dpi
1. Selection a colour from your tube and flood fill your image.
I am using #d1f9fe
Copy and then paste your tube onto your working image.
Position all the way to the right so just her tail is in your image.
Layers/duplicate, Image/mirror, Layers/merge/merge visible.
Effects/ plugins/ Funhouse/ Radial mirror (see screenshot below)

Effects/ plugins/ Funhouse/ Ring tile (see screenshot below)

2. Copy and then paste your tube onto your working image as a new layer.
Position to your liking, see screenshot below for mine. 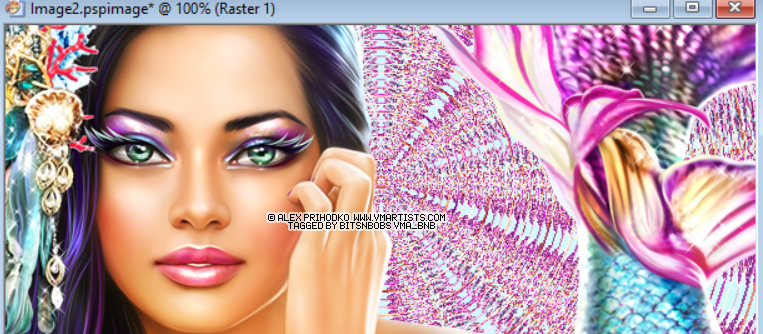
Add a drop shadow.
I am using...
V 3 - H 3 - O 80 - B 7 - Colour #000000 (see screenshot below)

Effects/ plugins/ DSB Flux/ Bubbles
10, 73, 21, 79 (see screenshot below)

Change your layers blend mode to hard light.
3. Copy and then paste your tube onto your working image as a new layer.
Image/ resize 35% all layers untabbed.
Position to your liking, mine is on the left.
Add a drop shadow using the same settings.
4. Copy and then paste your tube onto your working image as a new layer.
Position to your liking, mine is on the right.
You want her face taking up the right side of the tag.
Add a drop shadow using the same settings.
Change the layer blend mode to hard light and the layer opacity to 70%
5. Layers/ new raster layer.
Flood fill with a colour from your tube.
I am using #4cd8ef
Selections/select all, Selections/float, Selections/ defloat, Selections/ modify/ contract by 3,
flood fill with white #FFFFFF
Selections/ modify/ contract by 2, flood fill with the colour you selected mine is #4cd8ef
Selections/ modify/ contract by 1, hit delete on your keyboard.
Selections/ invert/ add your dropshadow.
6. Layers/ new raster layer.
Add your copyright info and name
export and save in your chosen format.
I use a transparent png.
7. For your avatar open a new image,
180 x 180 at 72 dpi.
Copy your tag, paste as a new layer.
Position to your liking.
Layers/ merge/ merge visible.
Add your copyright info, initial and then save.
Stores


BNB Blinkie


