


Autumn Bouquet
Tutorial written by and © to Bits N Bobs 15th November 2021.
Results are for personal use only.
No monetry gain allowed and that includes placing them behind a paid or donation based membership area.
You are not allowed to share/forward or translate any of my tutorials or place them on any blog, website, DVD or anywhere else without my permission.
These tutorials are written from my own ideas and any similarities to any other tutorial is purely coincidental.
All tutorials are for those with a working knowledge of paintshop pro.
I reserve the right to amend these terms at any time.
Supplies needed.
Font of choice for your name.
I am using Boshela from Dafont
Tube of choice.
I am using the one included in the kit.
Scrap kit Autumn Bouquet by BitsNBobs
https://mysticalscraps.com/index.php?main_page=index&cPath=7_433
Items I have used are...
Elements 73, 74, 76, 77, 79, 80, 83, 86,
Paper 5
Mask of choice.
I am using Mask 0300 from here by Simone
Leaf Animation available here
created by Lovey's Animations
Note
This tutorial was written in PSP 9.
Double click on your font and minimize.
Open all other supplies in paintshop.
Open a new image 700 wide X 700 high at 72 dpi
1. Selections/ select all.
Open your paper,
Copy, paste into selection, select none.
Close paper.
Open your chosen mask and crop it if needed.
You want the mask to fill the whole paper so no blank sides.
Once done minimize and go back to your working image
Layers/ new mask layer/ from image and select your mask.
Layers/ merge/merge group

Copy and paste elements to your liking or follow below for mine.
2. Copy E86, paste as a new layer.
Image/resize 61%, all layers untabbed.
Add a drop shadow.
I am using...
V 3 - H 3 - O 70 - B 7 - Colour #000000
Copy E74, paste as a new layer.
Image/resize 81%, all layers untabbed.
Add same drop shadow.
Position towards bottom center.
Copy E73, paste as a new layer.
Image/resize 41%, all layers untabbed.
Add same drop shadow.
Position towards bottom left.
Copy E83, paste as a new layer.
Image/resize 30%, all layers untabbed.
Add same drop shadow.
Position towards bottom right.
Layers/ arrange/ mmove down x 2.
Copy E77, paste as a new layer.
Image/resize 30%, all layers untabbed.
Add same drop shadow.
Position towards bottom slightly on the right.
Activate your top layer.
Copy E80, paste as a new layer.
Image/resize 33%, all layers untabbed.
Add same drop shadow.
Position towards the left and stand on the pumpkin.
Copy E79, paste as a new layer.
Image/resize 33%, all layers untabbed.
Add same drop shadow.
Position towards the right and stand on the tree stump.
Activate your frame layer.
Copy E76, paste as a new layer.
Image/resize 59%, all layers untabbed.
Image/ mirror
Add same drop shadow.
Position towards the right side.
3. Copy your tube and paste as a new layer.
Image/resize 31%, all layers untabbed.
Add same drop shadow.
Position towards the left side.
If you don't want the animation then add your
copyright, name and export as a transparent PNG.
4. To animate we first need to prepare our file.
Activate the top layer and add any copyright Info.
Also add your name unless saving as a blank for tag offers.
Close all layers except the frame and paper(mask) layer.
Edit/ copy merged.
Open animation shop.
Edit/ paste/ paste as new animation.
Edit/ copy
Edit/ paste/ paste after current animation.
We now have 2 frames.
Our leaf animation has 30 frames so we need to add more.
Press Shift+Ctrl+L until you have a total of 30 frames.
Alternatively Edit/ paste/ paste after current animation until you reach the 30 frames.
Edit/ Select all
Edit/ propogate paste
Open the leaf animation in animation shop.
Edit/ select all
Edit/ Copy.
Go back to your tag frames by clicking on the top border.
Be sure all the frames are still highlighted.
If not Edit/ select all.
Edit/ paste into selected frames.
Position your pointer towards the top left so it is just below the frame.

View/ Animation
Because you can't see the animation before you paste it you may need to try a couple of times for positioning.
Just Edit/ undo paste and then redo it until you have the correct position.
Don't close anything.
Now go back to Paintshop
Close your open layers and reopen your closed layers.
Edit/ copy merged.
Go back to animation shop.
Edit/ paste as new animation.
Edit/ Copy
Activate your main animation again by clicking on the top border.
Make sure all frames are highlighted.
If not Edit/ select all.
Edit/ paste/ paste into selected frame.
Position to your liking.
Remember to leave a little gap at the bottom.
View/ Animation, hopefully you can see the falling leaves ;)
File/ save as
Customize then follow the screen shots for my settings.


Click OK.
If you want to save these settings for transparent ani tags click the box.
I don't because I find it varies with different tags but these are goo for this one.
Click next until done and Voila.
If you saved this as a blank then to add your name just create it in paintshop.
Edit/ Copy merged
Open animation shop.
Edit/ paste as a new animation.
Edit/ copy
Open your tag.
Edit/ select all.
Edit/propogate paste.
Edit/ paste into selected frame.
Then edit/ save as and follow the same steps as before.

Autumn Nina
Tutorial written by and © to Bits N Bobs 4th November 2016.
Results are for personal use only.
No monetry gain allowed and that includes placing them behind a paid or donation based membership area.
You may add a link for this tutorial on your forum etc.
You are not allowed to share/forward or translate any of my tutorials or place them on any blog, website, DVD or anywhere else without my permission.
These tutorials are written from my own ideas and any similarities to any other tutorial is purely coincidental.
All tutorials are for those with a working knowledge of paintshop pro.
I reserve the right to amend these terms at any time.
Supplies needed.
Font of choice for your name.
I am using Midnight Legend
Tube of choice.
I am using Nina by Bits N Bobs available here at PFD
Tube is not to be used without the correct licence.
Masks of choice.
I am using Vix_Mask363 by Vix and Sg_double-stencilled eclipse1 by Essex Girl
both are available in the supplies file
Scrap kit Autumn available here
by Bits N Bobs
Note
Download masks and wordart supplies here
This tutorial was written in PSP 9.
Double click on your font and minimize.
Install your masks.
Open a new image, 600 w x 600 h at 72 dpi.
1. Copy paper 3.
Activate your working image.
Selections/ select all, paste into selection.
Layers/ Load/Save mask, Load mask from Disk,
scroll through and select your mask.
Tab Source Luminance, Fit to canvas, Invert transparency.

Layers/ merge/ merge group.
Selections/ select none.
2. Copy paper 9.
Activate your working image.
Selections/ select all, Layers/ new raster layer,
paste into selction.
Layers/ Load/Save mask, Load mask from Disk,
scroll through and select your mask.
Tab Source Luminance, Fit to canvas.

Layers/ merge/ merge group.
Selections/ select none.
Image/ canvas size.
Re-size to 700 pixels wide and high.
Center placement.

3. Copy element 65.
Paste as a new layer.
Image/ re-size to 400 pixels wide,
all layers un-tabbed.
Image/ mirror, position to the left.
Layers/ arrange/ move down.
4. Activate your top layer.
Copy element 60.
Paste as a new layer.
Image/ re-size to 400 pixels wide,
all layers un-tabbed.
Copy paper 4, using your magic wand
select the center of your frame.
Layers/ new raster layer.
Paste into selection (Ctrl+Shift+L)
Layers/ arrange/ move down.
Selections/ select none.
5. Copy the top half of your tube.
Paste as a new layer.
Selections/ select all, selections/ float/defloat.
Activate your frame layer and using your eraser
rub out the top part of the frame over her head.
Selections/ select none.
Erase all other parts of your tube that are
sticking out of the frame.
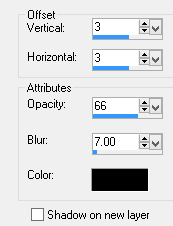
Add a dropshadow of choice.
I have used V3 H3 O66 B7 Colour #000000
Activate top layer.
Layers/ arrange/ merge down, repeat.
Add a dropshadow again.
6. Copy element 32.
Paste as a new layer.
Image/ re-size to 400 pixels wide,
all layers un-tabbed.
Position towards the top right corner.
Layers/ duplicate, Image/ flip.
Layers/ merge/ merge down.
Layers/ arrange/ move down.
7. Activate your top layer.
Copy element 74.
Paste as a new layer.
Image/ re-size to 400 pixels wide,
all layers un-tabbed.
Position to the right hand side,
move up slightly.
Add a drop shadow.
8. Copy element 46.
Paste as a new layer.
Image/ re-size to 200 pixels wide,
all layers un-tabbed.
Position at the top of the jewel droplet (element 74)
Add a drop shadow.
Layers/ duplicate layer.
Image/ mirror.
Position at the bottom right of the frame.
9. Copy element 44.
Paste as a new layer.
Image/ re-size to 400 pixels wide,
all layers un-tabbed.
Position at bottom left corner of the frame.
Add a drop shadow.
Layers/ arrange/ move down four times.
Your element should be below the jewel droplet.
10. Copy element 48.
Paste as a new layer.
Image/ re-size to 300 pixels wide,
all layers un-tabbed.
Position towards the bottom left corner.
Add a drop shadow.
11. Copy element 1.
Paste as a new layer.
Image/ re-size to 200 pixels wide,
all layers un-tabbed.
Position towards the middle right of your frame.
Add a drop shadow.
12. Copy element 5.
Paste as a new layer.
Image/ re-size to 200 pixels wide,
all layers un-tabbed.
Image/ flip
Position towards the top right corner.
Add a drop shadow.
13. Copy your wordart.
Paste as a new layer.
Position towards the bottom of your frame.
Layers/ arrange/ bring to top.
Selections/ all, Selection float, Selections de-float.
Selections/ modify/ expand by 2.
Layers/ new raster layer, floodfill with white (#ffffff)
Selection/ none.
Add a dropshadow.
14. Layers/ merge/ merge visible.
Add all copyright info.
Export and save as a transparent png.
Matching AV
15. For a matching AV open a new image
180 x 180 and 72 dpi.
Copy your tag and paste as a new layer.
Position to your liking.
Add copyright info and name,
export as before and save.

Autumn Beauty
Tutorial written by and © to Bits N Bobs 8th November 2012.
Results are for personal use only.
No monetry gain allowed and that includes placing them behind a paid or donation based membership area.
You are not allowed to share/forward or translate any of my tutorials or place them on any blog, website, DVD or anywhere else without my permission.
These tutorials are written from my own ideas and any similarities to any other tutorial is purely coincidental.
All tutorials are for those with a working knowledge of paintshop pro.
I reserve the right to amend these terms at any time.
Supplies needed.
Font of choice for your name.
I am using Dean Martin
Tube of choice.
I am using one by Elizabeth Austin
Mine is EA0042 - Autumn and available at UpYourArt here
Tube is not to be used without the correct licence.
Plugin - Penta.com dot and cross ( Garbage collection )
Template 22 by Vix
Scrap kit 'Sunflower Patch' by Bits N Bobs
Items I have used are...
Paper 1, Elements 17, 31, 37, 48, 56
Note
This tutorial was written in PSP 9.
Install your plugin.
Double click on your font and minimize.
Open all other supplies in paintshop.
Open a new image, 500 x 500 at 72 dpi.
1. Re-size your template,
all layers tabbed to 500 pixels wide.
Shift + D to duplicate, close the original template
remembering to say no to saving the changes.
Delete the Background and TOU layers.
2. Copy element 31 and paste as a new layer on your template.
Image/ Mirror, position to the bottom right.
Layers/ Duplicate, Image/ Mirror Layers/ Merge/ Merge down.
Layers/ Arrange/ Send to bottom.
Add a drop shadow of choice.
I am using V 3, H 3, O 75, B 9 Colour black #000000
3. Copy and paste element 56 as a new layer,
position towards the right.
Layers/ Duplicate, Image/ Mirror, Image/ flip
Layers/ Merge/ Merge down.
Layers/ Arrange/ Send to bottom.
Add the same drop shadow as before.
4. Copy and paste element 37 as a new layer.
Image/ Mirror, position towards the bottom left corner.
Layers/ Duplicate, Image/ Mirror, Image/ flip
Layers/ Merge/ Merge down.
Layers/ Arrange/ Send to bottom.
Add the same drop shadow as before.
5. Re-size the paper to 500 pixels high,
copy your paper.
Activate your leaves layer of the template.
Selections/ Select all, Selections/ Float, Selections/ Defloat.
Edit, paste into selection.
Effects/ 3D Effects/ Inner Bevel
Bevel 2: Width 15: Smoothness 0: Depth 5: Ambience 0:
Shininess 0: Colour# ffffff: Angle 315: Intensity 50: Elevation 30:
Selections/ Select None

6. Activate the merged layer ( Orange circle ).
Effects/ penta.com/dots and cross.
amount: 72, cross distance: 10, cross width:2
Activate the name plate layer.
Effects/ penta.com/dots and cross.
Same settings as before.

7. Activate the optional words layer.
Selections/ Select all, Selections/ Float, Selections/ Defloat.
Selections/ Modify/ Expand by 2 pixels.
Layers/ Add a new raster layer.
Flood fill the wording with white #ffffff .
Layers/ arrange/ move down.
Selections/ Modify/ Expand by 2 pixels.
Layers/ Add a new raster layer.
Flood fill the wording with orange #df5e09
Layers/ arrange/ move down.
Selections/ Select none.
Add the same drop shadow as before.
8. Activate the circle frame inner shading layer.
Copy your tube and paste as a new layer.
Image/ Re-size to 300 pixels high.
All layers un-tabbed.
Layers/ Arrange/ Bring to the top.
Position your tube so it looks like she is sat on
top of the T in Beauty.
Add the same drop shadow as before.
9. Activate the merged layer ( Orange circle ).
Copy your tube again (not the one you just pasted )
and paste as a new layer.
Image/ Re-size to 400 pixels high.
All layers un-tabbed.
Image/ Mirror, position slightly to the left.
You want her head just touching the top of
the orange circle.
Layers/ Properties and change the blend mode
of this layer to hard light.
Activate the Orange circle layer again.
Selections/ Select all, Selections/ Float,
Selections/ Defloat, Selections/ Invert.
Activate the larger tube layer and hit delete on your keyboard.
10. Activate element 17, copy,
Activate your top layer.
Paste as a new layer.
Position in the bottom center of the frame.
Image/ Re-size to 200 pixels wide.
All layers un-tabbed.
Add the same drop shadow as before.
Layers/ Arrange/ Move Down
11. Add all copyright info, your name and save.
Stores


BNB Blinkie


