

Monday, 21 November 2011

Tutorial written by and © to Bits N Bobs 21st November 2011.
Results are for personal use only.
No monetry gain allowed and that includes placing them behind a paid or donation based membership area.
You are not allowed to share/forward or translate any of my tutorials or place them on any blog, website, DVD or anywhere else without my permission.
These tutorials are written from my own ideas and any similarities to any other tutorial is purely coincidental.
All tutorials are for those with a working knowledge of paintshop pro.
I reserve the right to amend these terms at any time.
Supplies needed.
Font of choice for your name.
I am using Bickley Script Plain
Tube of choice.
I am using one by DiMary
Mine is Snow Maiden and available at Pics For Design
Tube is not to be used without the correct licence.
Scrap kit Mary Christmas by Bits N Bobs
Items I have used from this kit are...
Paper 3, MC 6, MC 23, MC 53, MC 63, MC 70,
Mask of choice. I am using mask 25 by Gabee
Note
This tutorial was written in PSP 9.
Open all supplies in paintshop except the font and Mask.
Double click on your font and minimize.
Install your mask.
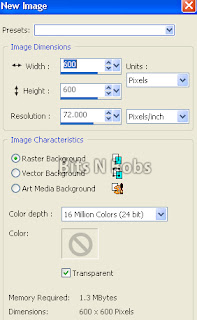
1.Open a new image 600x600 at 72 pixels per inch.
2.Copy your paper.
Paste as a new layer.
Image/ re-size, re-size 60% all layers un-tabbed.
Layers/ Load,save mask/ load mask from disk.
Find Gabeemask25, Source luminance checked, Fit to layer checked,
Invert Transparency checked, Hide all mask checked.
Image/ rotate/ free rotate 90 right all layers un-tabbed.
Layers/ merge/merge group.

3.Activate your masked layer,
Copy your tube, paste as a new layer.
Re-size, I have re-sized 60%, Image/ mirror
Position to your liking,
Layers/ properties, change the blend mode to Overlay.
Erase any parts you don't want showing.
4.Copy MC63 Paste as a new layer.
Image/ re-size, re-size 60%
Copy MC23, paste as a new layer.
Position to your liking.
Layers/ duplicate layer.
Image/ flip.
Position to your liking.
4.Copy MC70, Paste as a new layer.
Image/ re-size, re-size 70% all layers un-tabbed.
Add a drop shadow of choice.
I am using I use V3, H3, O75, B7.00, colour black.
Copy MC 6, paste as a new layer.
Image/ re-size, re-size 60% all layers un-tabbed.
Position to your liking.
Add a drop shadow of choice.
I am using I use V3, H3, O75, B7.00, colour black.
5.Copy your tube, paste as a new layer.
Image/ mirror, image/ re-size 35% all layers un-tabbed.
Add a drop shadow of choice.
I am using I use V3, H3, O75, B7.00, colour black.
6.Copy MC53, paste as a new layer,
position to the bottom of your tube.
Add a drop shadow of choice.
I am using I use V3, H3, O75, B7.00, colour black.
7.Add all your copyright info and save.
Saturday, 19 November 2011

Tutorial written by and © to Bits N Bobs 19th February 2011.
Results are for personal use only.
No monetry gain allowed and that includes placing them behind a paid or donation based membership area.
You are not allowed to share/forward or translate any of my tutorials or place them on any blog, website, DVD or anywhere else without my permission.
These tutorials are written from my own ideas and any similarities to any other tutorial is purely coincidental.
All tutorials are for those with a working knowledge of paintshop pro.
I reserve the right to amend these terms at any time.
Supplies needed.
Font of choice for your name.
I am using Bickley script plain
Tube of choice.
I am using 3 by Elias Chatzoudis bought from MPT
Mine are Lucela, Adoette and Thanks babe.
Elias is now at Psp Tubes Emporium
Tubes are not to be used without the correct licence
Scrap kit Fall About by Bits N Bobs
Items I am using from this kit are...
FA paper 4, FA 37, 49, 52, 68,
Note
This tutorial was written in PSP 9 and needs animation shop for the animation.
Open all supplies in paintshop except the font.
Double click on your font and minimize.
1.Activate FA68, image/ re-size, re-size to 96%
and 72 pixels per inch, all layers tabbed.
Using your magic wand select the center of
each part of the frame.
Selections/ modify/ expand by 3.
Layers/ new raster layer.
Copy your paper and paste into selection.
Layers/ arrange/ move down.
Copy FA 52, paste as a new layer,
selections/ invert, hit delete on your keyboard.
Selections, select none, layers/ merge/ merge down.
2.Copy FA 52, paste as a new layer,
image/ mirror, position to your liking,
arrange/ send to bottom.
Copy FA37, paste as a new layers.
Arrange/ move to top.
Image/ re-size, re-size 30% all layers un-tabbed.
3.Copy FA 49, paste as a new layer,
Image/ re-size, re-size 45% all layers un-tabbed.
Using your raster deform tool turn the layer so it is straighter.
Position at the bottom below the frame.
Layers/ arrange/ send to bottom.
4.Activate the frame layer.
Copy your first tube, image/ re-size, re-size 85%
Position on the first part of the frame.
Copy the second tube layer, image/ re-size, re-size 65%.
Position on the second part of the frame.
Layers/ merge/ merge down.
Copy the third tube layer, image/ re-size, re-size 75%.
Position on the third part of the frame.
Layers/ merge/ merge down.
Activate the frame layer.
Using your magic wand select the center of
each part of the frame.
Selections/ invert, activate the tubes layer.
Using your eraser tool erase the parts at the bottom that are outside the frame.
5.Add and drop shadows to the layers you require.
Add all copyright info and name.
Export as a transparent png file and save.
Friday, 18 November 2011


Tutorial written by and © to Bits N Bobs 18th November 2011.
Results are for personal use only.
No monetry gain allowed and that includes placing them behind a paid or donation based membership area.
You are not allowed to share/forward or translate any of my tutorials or place them on any blog, website, DVD or anywhere else without my permission.
These tutorials are written from my own ideas and any similarities to any other tutorial is purely coincidental.
All tutorials are for those with a working knowledge of paintshop pro.
I reserve the right to amend these terms at any time.
Supplies needed.
Font of choice for your name.
I am using Bickley Script Plain
Tube of choice.
I am using one by Camilla Drakenborg
Mine is CA0054 - Poison Ivy and available at UpYourArt
Tube is not to be used without the correct licence.
Template 17 by Bits N Bobs
Plugins needed.
AAA frames photoframe
Note
This tutorial was written in PSP 9 and needs animation shop for the animation.
Open all supplies in paintshop except the font.
Double click on your font and minimize.
1.Close copyright layer and activate the bg layer.
Copy your tube and paste as a new layer.
Position the tube layer in the center of your image.
Effects/ reflection effects/ Pattern

2.Copy your bonus close up tube, paste as a new layer.
Add a drop shadow of choice.
I am using H0, V0, O100, B11, colour #000000
3.Activate the txt layer.
Adjust/ add-remove noise/ Add noise
Random-checked, Noise-41%, Monochrome-checked
Add the same noise to the squares and line layers.

4.Layers/ merge/ merge visible.
Effects/ Plugins/ AAA frames/ foto frame,
Add your copyright info, name and save.

5.Undo the last 3 steps on your tag so the layers are unmerged.
Close the txt and txt glow layers.
Re-size the tube to 65%, edit/ copy merged.
Open a new image 150 x 150 for your avatar.
Edit/ paste/ paste as a new layer.
Image/ mirror. Position to your liking.
Layers/ merge/ merge visible.
Effects/ Plugins/ AAA frames/ foto frame.
Use the same settings so just click ok.
Add your copyright info and save.
If you like and/or save these templates please click here as a thank you :O)
Very much appreciated and won't cost you a penny


Merry Christmas
Tutorial written by and © to Bits N Bobs 18th November 2011.
Results are for personal use only.
No monetry gain allowed and that includes placing them behind a paid or donation based membership area.
You are not allowed to share/forward or translate any of my tutorials or place them on any blog, website, DVD or anywhere else without my permission.
These tutorials are written from my own ideas and any similarities to any other tutorial is purely coincidental.
All tutorials are for those with a working knowledge of paintshop pro.
I reserve the right to amend these terms at any time.
Supplies needed.
Font of choice for your name.
I am using Bickley Script Plain
Tube of choice.
I am using one by Zephir d'elph
Mine is ZD0010 - Bergamotte and available at UpYourArt
Tube is not to be used without the correct licence.
Template Merry Christmas from Patricia
Snow animation here.
Thank you to Bev at Horseplayspasture for her permission to us this.
Please do not share or include this snow animation in any other tutorials
with first obtaining Bev's permission.
Plugins needed.
Xero Fritilliary under freeware you want the full 40 plugin pack.
Plugin - Penta.com dot and cross ( Garbage collection )
Note
This tutorial was written in PSP 9 and needs animation shop for the animation.
Open all supplies in paintshop except the font.
Double click on your font and minimize.
1.Activate the template. Re-size to 600 x 600 and 72dpi. All layers tabbed.
Hit shift and D together on your keyboard to duplicate the image,
and close the original layer, no you do not want to save it.
2.Close the copyright layer.
Activate the circle layer using the dropper tool select a forground colour from your tube.
I have chosen a dark colour from the background of mine.
Select black as the background colour.
Activate your colour replacer tool and double left click on your image.
The circle should now have changed colour.
Activate circle 2 layer and double click on the image.
Layers/ arrange/ move down, layers/ merge/ merge down.
Effects/ plugins/ xero/ fritilliary

3.Activate the circle 1 layer using the dropper tool select a forground colour from your tube.
I have chosen a red colour from the tube itself .
Select #c0c0c0 as the background colour.
With your colour replacer tool double left click on your image.
Activate circle 3 layer and double click on the image.
Layers/ arrange/ move down, layers/ merge/ merge down.
Effects/ plugins/ xero/ fritilliary, same settings so just hit ok
4.Activate the big circle layer using the dropper tool select
a forground colour from your tube.
I have chosen a lighter colour from the background of mine.
Select black as the background colour.
Activate your colour replacer tool and double left click on your image.
Plugins/ Penta/ Dot and cross

5.Activate the little circle.
Layers/ properties, change the blend mode to Luminance (Legacy)
Copy your tube, image/ re-size, re-size to 80% all layers un tabbed.
Add a drop shadow to all layers you want.
I am using H0, V0, O100, B11, colour #000000
On the tube layer only.
NOTE:
If you do not want to animate then add your copyright info, text, name and save.
Animation steps.
6.Activate the big circle layer.
We will now begin adding the snow.
On the snow image copy frame 1,
paste as a new layer on your working image.
Rename the layer to snow 1.
Repeat until you have 10 snow layers.
Activate your big circle layer.
Selections/ select all, selections/ float, selections/ defloat
Selections/ invert.
In turn activate your snow layers and hit delete on your keyboard on each one.
Selections/ select none.
If you want to you can now change the colour of the text to your liking.
Activate the top layer.
Add a new raster layer.
Add all your copyright info and your name.
7.Close all snow layers except snow layer 1.
Activate snow layer 1.
Edit/ Copy merged.
Open animation shop.
Paste as a new animation.
Return to paintshop.
Close snow layer 1.
Un-hide and activate snow layer 2.
Back to animation shop and paste after current layer.
Keep repeating these steps until you have activated snow layer 10.
Edit/ Copy merged.
Back to animation shop and paste after current layer.
View/ Animation if you like it save it.


Thursday, 17 November 2011

Tutorial written by and © to Bits N Bobs 17th November 2011.
Results are for personal use only.
No monetry gain allowed and that includes placing them behind a paid or donation based membership area.
You are not allowed to share/forward or translate any of my tutorials or place them on any blog, website, DVD or anywhere else without my permission.
These tutorials are written from my own ideas and any similarities to any other tutorial is purely coincidental.
All tutorials are for those with a working knowledge of paintshop pro.
I reserve the right to amend these terms at any time.
Supplies needed.
Font of choice for your name.
I am using Bickley Script Plain
Tube of choice.
I am using one by Carlos Diez
Mine is GA0001 - Audio Slave and available at UpYourArt
Tube is not to be used without the correct licence.
Template Bitch 1 from Addictive Addicts
FTU Scrap kit Gothic Halloween by Kittz Kreationz
From this kit I am using Paper 5 and Hanging heart
Plugins needed.
Xero Fritilliary under freeware you want the full 40 plugin pack.
Note
This tutorial was written in PSP 9 and needs animation shop for the animation.
Open all supplies in paintshop except the font.
Double click on your font and minimize.
1.Activate the template. Re-size to 600 x 600 and 72dpi. All layers tabbed.
Hit shift and D together on your keyboard to duplicate the image,
and close the original layer, no you do not want to save it.
2.Close the background and copyright layers.
Activate the white circle layer and copy your paper.
Selections/ select all, selections/ float, selections/defloat, paste into selection.
Re-name this layer frit 1,
Layers/ duplicate layer, Re - name this layer to frit 2
Layers/ duplicate layer, Re - name this layer to frit 3
Activate frit 1. Effects/ plugins/ xero/ fritilliary
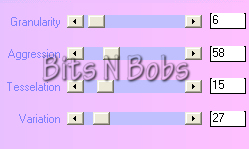
Activate frit 2 Effects/ plugins/ xero/ fritilliary same settings but
this time change the variation to 28.
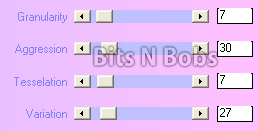
Activate frit 3 Effects/ plugins/ xero/ fritilliary same settings but
this time change the variation to 29.
3.Activate the sm white circle layer and copy your paper again.
Selections/ select all, selections/ float, selections/defloat, paste into selection.
Adjust/ brightness and contrast/ brightness-contrast,
Brightness 33 - Contrast 9
Effects/ plugins/ xero/ fritilliary, same settings so just hit ok
4.Activate pink rect,
Adjust/ colour balance/ manual colour correction.
My settings are below but you are free to use your own.

Activate the pink star layer.
Adjust/ colour balance/ manual colour correction same settings.
Activate the pink txt border layer.
Adjust/ colour balance/ manual colour correction same settings.
Activate the grey rect; layer.
Adjust/ colour balance/ manual colour correction.

5.Add the fritilliary effect to any layer you require.
I have added it to all layers except .....
Red rectangle and the text layers.
To do so remember to activate each layer and
effects/ plugins/ xero/ fritilliary, same settings so just hit ok each time.
6.Activate the pink star layer
Add a drop shadow of choice.
I am using H0, V0, O100, B11, colour #000000
Move around any layers you want to at this point.
I have moved down the text, red rect: and white rect: layers.
Activate the pink star layer again.
Copy your tube and paste as a new layer.
Add a drop shadow of choice and position to your liking.
Re-size if needed.
Using your rectangular selection tool cut away the part of
your tubes right leg so it looks like it is behind the rectangle layer.

Copy the hanging heart, paste as a new layer,
re-size 49% all layers un tabbed.
Position hanging from your tubes left hand.
Layers/ merge/ merge down.
7.Activate the pink star layer again.
From your tube image copy the bonus close up.
Paste as a new layer and position to your liking.
Activate the pink star layer again.
Selections/ select all, selections/ float,
selections/ defloat, Selections/ invert.
Activate your close up tube layer and erase any
part you don't want outside the star.
Lower the layer opacity of the close up tube to 78%
NOTE:
If you do not want to animate then add your copyright info, text, name and save.
Animation steps.
8.Close the following layers.
Black Circle, frit 1, frit 2 and frit 3
Activate any open layer and layers/ merge/ merge visible.
Open black circle and activate frit 1.
Edit/ copy merged. Open animation shop.
Edit/ Paste as a new animation Back to painstshop.
Close frit 1. Open and activate frit 2. Edit/ copy merged.
In animation shop edit/ paste/ paste after current frame. Back to painstshop.
Close frit 2. Open and activate frit 3. Edit/ copy merged.
In animation shop edit/ paste/ paste after current frame.
Back to painstshop. Close all layers, open and activate the merged layer.
Edit/ copy and go back to animation shop. Edit/ paste as a new animation.
Edit/ copy and minimise. Activate the 3 frame image. Edit/ Select all,
Edit/ propogate paste, Edit/ paste/ paste into selected frame.
9.In paintshop add a new raster layer.
Create your name, text and add your copyright info.
Edit/ copy and go back to animation shop. Edit/ paste as a new animation.
Edit/ copy and minimise. Activate the 3 frame image. Edit/ Select all,
Edit/ propogate paste, edit/ paste/ paste into selected frame.
View/ Animation if you like it save it.
Wednesday, 16 November 2011
If you like and/or save these templates please click here as a thank you :O)
Very much appreciated and won't cost you a penny

Psd and psp files included.
You can download this template here


To view the animation click here
Naughty girlTutorial written by and © to Bits N Bobs 16th November 2011.
Results are for personal use only.
No monetry gain allowed and that includes placing them behind a paid or donation based membership area.
You are not allowed to share/forward or translate any of my tutorials or place them on any blog, website, DVD or anywhere else without my permission.
These tutorials are written from my own ideas and any similarities to any other tutorial is purely coincidental.
All tutorials are for those with a working knowledge of paintshop pro.
I reserve the right to amend these terms at any time.
Supplies needed.
Font of choice for your name.
I am using Bickley Script Plain and Nueva Std Cond
Tube of choice.
I am using one by Nicholas Garton
Mine is NG0017- Sexy Santa and available at UpYourArt
Tube is not to be used without the correct licence.
Plugins needed.
Xero Fritilliary under freeware you want the full 40 plugin pack.
Note
This tutorial was written in PSP 9 and needs animation shop for the animation.
Open all supplies in paintshop except the font.
Double click on your fonts and minimize.
1. Open a new image, 600 w x 200 h at 72 dpi.
Select your flood fill bucket.
Select a colour from your tube and flood fill your image.
I have used #de383e
Copy your tube and paste as a new layer.
Layers/ duplicate layer, close the duplicated layer.
Position the first tube layer in the center of your image.
Effects/ reflection effects/ Pattern

2. Re - name this layer to frit 1
Layers/ duplicate layer, Re - name this layer to frit 2
Layers/ duplicate layer, Re - name this layer to frit 3
Activate frit 1.
Effects/ plugins/ xero/ fritilliary
Activate frit 2
Effects/ plugins/ xero/ fritilliary same settings but
this time change the variation to 28.
Activate frit 3
Effects/ plugins/ xero/ fritilliary same settings but
this time change the variation to 29.
3. Open the duplicated tube layer.
Layers/ duplicate layer, close the duplicated layer.
On your open tube layer, effects/ texture effect/ mosaic antique

Layers/ properties and change the layer blend mode to Luminance ( legacy)
4. Open the closed duplicated tube layer.
Position to your liking.
Add a drop shadow.
I am using H3, V3, O100, B15, colour #000000
Close all but the top 2 layers.
Layers/ merge/ merge visible.
Re-name this layer to tube layer.
NOTE:
If you do not want to animate then add your copyright info, text, name and save.
Then move on to part 7 for the avatar.
Animation steps.
5. Close the tube layer.
Open the bottom layer and frit 1. Activate frit 1.
Edit/ copy merged. Open animation shop.
Edit/ Paste as a new animation Back to painstshop.
Close frit 1. Open and activate frit 2. Edit/ copy merged.
In animation shop edit/ paste/ paste after current frame. Back to painstshop.
Close frit 2. Open and activate frit 3. Edit/ copy merged.
In animation shop edit/ paste/ paste after current frame.
Back to painstshop. Close all layers, open and activate your tube layer.
Edit/ copy and go back to animation shop. Edit/ paste as a new animation.
Edit/ copy and minimise. Activate the 3 frame image. Edit/ Select all,
Edit/ propogate paste, edit/ paste/ paste into selected frame.
6. In paintshop add a new raster layer to your tube.
Create your name, text and add your copyright info.
Edit/ copy and go back to animation shop. Edit/ paste as a new animation.
Edit/ copy and minimise. Activate the 3 frame image. Edit/ Select all,
Edit/ paste/ paste into selected frame.
View/ Animation if you like it save it.
7. Open a new image for your avatar.
I am using 150x150 at 72 pixels per inch.
Open all layers on the main image we were working on.
Position the layers to your liking.
Edit/ Copy merged, paste as a new layer onto your avatar image.
Position and re-size to your liking, Image/ mirror.
Layers/ add new raster layer.
With your paintbrush paint a line about 3 pixels wide around the
entire outer edge if the image.
Add a drop shadow if you want one
Layers/ merge/ merge visible.
Remember for the copyright info to add © Artists name and your licence number.
Tuesday, 15 November 2011


From here to eternity
Tutorial written by and © to Bits N Bobs 15th November 2011.
Results are for personal use only.
No monetry gain allowed and that includes placing them behind a paid or donation based membership area.
You are not allowed to share/forward or translate any of my tutorials or place them on any blog, website, DVD or anywhere else without my permission.
These tutorials are written from my own ideas and any similarities to any other tutorial is purely coincidental.
All tutorials are for those with a working knowledge of paintshop pro.
I reserve the right to amend these terms at any time.
Supplies needed.
Font of choice for your name.
I am using Bickley Script Plain
Tube of choice.
I am using one by Steve Baier
Mine is SBo145 - From here to eternity and available at UpYourArt
Tube is not to be used without the correct licence.
Plugins needed.
Xero Fritilliary under freeware you want the full 40 plugin pack.
AAA frames photoframe
Note
This tutorial was written in PSP 9 and needs animation shop for the animation.
Open all supplies in paintshop except the font.
Double click on your font and minimize.
Open a new image, 600 w x 200 h at 72 dpi.
1.Copy your tube and paste as a new layer on your working image.
Layers/ duplicate layer, close the duplicated layer.
Position the first tube layer in the center of your image.
Effects/ reflection effects/ Kaleidoscope

Effects/ plugins/ xero/ fritilliary

2.Open the duplicated layer.
Image/ re-size, I re-sized mine to 70% all layers un-tabbed.
Position to your liking.
Add a drop shadow.
I am using H3, V3, O100, B7, colour #000000
Layers/ duplicate layer, close the duplicate and activate the layer below.
3.Effects/ texture effects/ mosaic antique,

Effects/ distortion effects/ wind,

Layers/ duplicate layer, Image/ mirror, layers/ merge/ merge down.
4.Open up the duplicate layer we closed earlier and position to your liking.
Add another drop shadow.
I am using H3, V3, O100, B7, colour #000000
Layers/ merge/ merge visible.
Effects/ Plugins/ AAA frames/ foto frame,

5.Open a new image 180 x 180 for your avatar.
Copy your merged signature.
Paste as a new layer onto your avatar image.
Position to your liking, Image/ mirror.
Layers/ merge/ merge visible.
Effects/ Plugins/ AAA frames/ foto frame.
You will be using the same settings as before.
6.Add your copyright info and name to both and save.
For the AV you need © Artist name and your licence #
The tag needs full copyright info.

Tutorial written by and © to Bits N Bobs 15th November 2011.
Results are for personal use only.
No monetry gain allowed and that includes placing them behind a paid or donation based membership area.
You are not allowed to share/forward or translate any of my tutorials or place them on any blog, website, DVD or anywhere else without my permission.
These tutorials are written from my own ideas and any similarities to any other tutorial is purely coincidental.
All tutorials are for those with a working knowledge of paintshop pro.
I reserve the right to amend these terms at any time.
Supplies needed.
Font of choice for your name.
I am using Bickley Script Plain
Tube of choice.
I am using one by Marc Lambrette
Mine is MA0037 - The White Witch and available at UpYourArt
Tube is not to be used without the correct licence.
Scrap kit White Christmas by Bits N Bobs
Items I have used from this kit are...
Paper 5, Paper 7, Elements 3, 4, 5 ,
Snow animation here.
Thank you to Bev at Horseplaypastures for her permission to use this.
Please do not share or include this snow animation in any other tutorials
with first obtaining Bev's permission.
Mask of choice. I am using mask 53 by Gabee
Plugin EyeCandy for the glass but this is optional
Note
This tutorial was written in PSP 9.
Open all supplies in paintshop except the font and Mask.
Double click on your font and minimize.
Install your mask and plugins.
1.Open a new image 600x600 at 72 pixels per inch.
2.Copy paper7, activate your new image.
Selections/ select all/ paste into selection, selections/ select none.
Layers/ Load,save mask/ load mask from disk.
Find Gabeemask53, Source luminance checked, Fit to layer checked, Invert Transparency checked, Hide all mask checked.
Layers/ merge/merge group.

3.Copy element 4, paste as a new layer.
Image/ re-size 80% all layers un-tabbed.
With your magic wand select the center part of the frame.
Select/modify/expand and expand by 3.
Copy paper 5, add a new raster layer, paste into selection.
Selections/ select none.
Layers/ arrange/ move down.
4.Activate your bottom layer, copy element 3, paste as a new layer.
Image / re-size 59% all layers un-tabbed.
Position to your liking.
5.Activate your top layer, copy element 5, paste as a new layer.
Position to your liking. Mine is sat on the left of the bottom bow.
6.Copy your tube and paste as a new layer.
Re-size if needed remembering to untab all layers.
I am not re-sizing mine. Image/ mirror.
With your selection tool remove everything below your tubes waist.
Position to your liking. We are going to make her pop out of the frame.

7.Activate your frame layer and using your magic wand
select the center of the frame.
Select/modify/expand and expand by 3.
Selections/ invert. Activate your tube layer.
Erase from the bottom any part hanging below the frame.
Selections/ Select none.
Add a dropshadow of choice.
I am using I use V3, H3, O65, B7.00, colour black.
Layers/ arrange/ move down.
Activate the bird and add the same drop shadow.
NOTE: If you do not wish to animate you can now add all your copyright info and save.
Otherwise continue on to step 8 for the animation.
Animation
8.Activate the bottom layer.
Adjust/ brightness and contrast,
brightness 16, contrast -20
Activate the layer below your frame layer.
Adjust/ brightness and contrast,
brightness 16, contrast -27
Selections/ select all, Selections/ float, Selections/ defloat.
Layers/ new raster layer.
Effects/ eye candy/ glass using the setting in the screen shot below.

9.Activate the layer below your glass layer.
We will now begin adding the snow.
On the snow image copy frame 1,
paste as a new layer on your working image.
Rename the layer to snow 1.
Repeat until you have 10 snow layers.
Selections/ invert.
In turn activate your snow layers and hit delete on your keyboard on each one.
Selections/ select none.
Activate snow layer 10.
Add a new raster layer.
Add all your copyright info and your name.
10.Activate snow layer 10.
Close all snow layers except snow layer 1.
Activate snow layer 1.
Edit/ Copy merged.
Open animation shop.
Paste as a new animation.
Return to paintshop.
Close snow layer 1.
Un hide and activate snow layer 2.
Back to animation shop and paste after current layer.
Keep repeating these steps until you have activate snow layer 10.
Edit/ Copy merged.
Back to animation shop and paste after current layer.
View/ animation and save


Monday, 14 November 2011

Tutorial written by and © to Bits N Bobs 14th November 2011.
Results are for personal use only.
No monetry gain allowed and that includes placing them behind a paid or donation based membership area.
You are not allowed to share/forward or translate any of my tutorials or place them on any blog, website, DVD or anywhere else without my permission.
These tutorials are written from my own ideas and any similarities to any other tutorial is purely coincidental.
All tutorials are for those with a working knowledge of paintshop pro.
I reserve the right to amend these terms at any time.
Supplies needed.
Font of choice for your name.
I am using Bickley Script Plain
Tube of choice.
I am using one by Guy Powers
Mine is GPXMAS - Bonnie pages Christmas and available at UpYourArt
Tube is not to be used without the correct licence.
Scrap kit Peace On Earth by Bits N Bobs
Items I have used from this kit are...
POE 1, POE 60, Paper 1, Paper 10,
Plugin - Penta.com dot and cross ( Garbage collection )
Mask of choice. I am using mask 50 by Gabee
Note
This tutorial was written in PSP 9.
Open all supplies in paintshop except the font and Mask.
Double click on your font and minimize.
Install your mask and plugins.
1.Open a new image 600x600 at 72 pixels per inch.

2.Copy POE60 and paste as a new layer.
With your magic wand select the center part of the frame.
Select/modify/expand and expand by 3.
Copy paper 1, add a new raster layer, paste into selection.
Selections/ select none.
Layers/ arrange/ send to bottom.
Effects/ penta.com/dots and cross.
amount: 72, cross distance: 10, cross width:2

3.With your rectangular selection tool select a rectangle as in the screenshot below.
Add a new raster layer, copy paper 10 and paste into selection.
Selections/select none, layers/ arrange/ send to bottom.

4.Layers/ Load,save mask/ load mask from disk.
Find Gabeemask50, Source luminance checked, Fit to layer checked, Invert Transparency checked, Hide all mask checked.

5.Layers merge/ merge group.
Activate the top layer.
Add a drop shadow of choice.
I use V3, H3, O100, B7.00, colour black.
6.Copy POE 1, paste as a new layer.
Position over on the left hand side so it covers the tree on the frame.
Add a drop shadow of choice.
I use V3, H3, O100, B7.00, colour black.
Layers/ merge/ merge down.
7.Copy you tube and paste as a new layer.
Re-size if needed remembering to untab all layers.
I have re-sized mine to 65%.
Re-position if needed and ddd a drop shadow of choice.
I use V3, H3, O100, B7.00, colour black.
Layers/ merge/ merge down.
8.Add a new raster layer.
Add all copyright info, your name and save.
Subscribe to:
Posts
(Atom)
Stores


BNB Blinkie


