
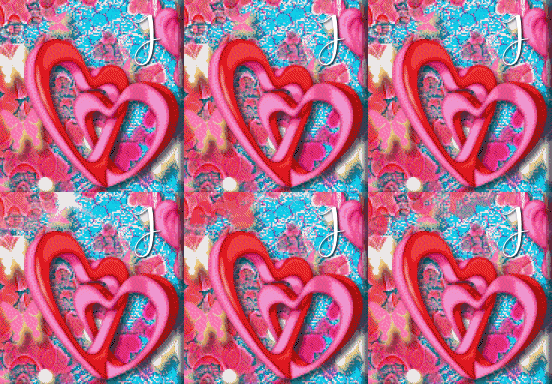
Candy Kisses
Tutorial written by and © to Bits N Bobs 12th January 2022.
Results are for personal use only.
No monetry gain allowed and that includes placing them behind a paid or donation based membership area.
You are not allowed to share/forward or translate any of my tutorials or place them on any blog, website, DVD or anywhere else without my permission.
These tutorials are written from my own ideas and any similarities to any other tutorial is purely coincidental.
All tutorials are for those with a working knowledge of paintshop pro.
I reserve the right to amend these terms at any time.
Supplies needed.
Font of choice for your name.
I am using Mister Valentine
Tube of choice.
I am using Cupids Bow is coming by Bits N Bobs
Tube is not to be used without the correct licence.
Scrap kit freebie Candy Kisses by Bits N Bobs
Items I have used are...
Elements 1, 5, 8,
Papes 1 and 2
Mask of choice
I am using mask 0316 by Simone
Animation
I am using Ani 253 by Simone
Note
This tutorial was written in PSP 9.
Double click on your font and minimize.
Open all other supplies in paintshop.
Install any required plugins
Re-size both papers to 600 pixels wide.
Open a new image, 600 w x 250 h at 72 dpi.
1. Open paper 1,
Copy, paste as a new layer on working image.
Effects/ Edge effects/ Enhance more.
Open paper 4,
Layers/ new mask layer/ from image and select your mask.
Layers/ merge/merge group
Copy, paste as a new layer on working image.
Effects/ Edge effects/ Enhance more.
2. Copy E1, paste as a new layer.
Re-size to 22%, all layers untabbed.
Position to your liking on the right.
Layers/ Duplicate, Image/ Mirror, Image/ Flip
Layers/ Merge/ Merge down.
Add a drop shadow.
I am using...
V 3 - H 3 - O 65 - B 5 - Colour #000000


Layers/ Merge/ merge visible.
File, save as PSP 1.
3. Open a new image, 600 w x 250 h at 72 dpi.
Copy E5, paste as a new layer.
Re-size to 11%, all layers untabbed.
Position to your liking in the top left corner.
Layers/ Duplicate, Image/ Mirror
Layers/ Merge/ Merge down.
Add a drop shadow.
I am using the same settings throughout.
4. Copy your chosen tube, paste as a new layer.
Re-size to 60%
Position to the left hand side.
Add dropshadow.
V 3 - H 3 - O 65 - B 5 - Colour #000000
5. Copy E8, paste as a new layer.
Re-size to 5%, all layers untabbed.
Position to your liking in the bottom right corner.
Add dropshadow.
V 3 - H 3 - O 65 - B 5 - Colour #000000
6. Copy paper 2, paste as a new layer.
Selections/Select all, Image/ crop to selection.
Selections/Select all, Selections /Modify, contract by 5,
Edit/ Cut.
Add dropshadow.
Repeat dropshadow with H -3 and V -3
7. Layers/ New raster layer and addd your copyright info
Layers/ Merge/ merge visible.
File, save as PSP 2.
For animation skip the step in the note below and skip to ANIMATION SHOP.
NOTE *****
If you don't want animation
Add your copyright info, Name and File/Export as jpg and save.
END NOTE *****
ANIMATION SHOP
8. Now we open animation shop.
Open PSP 1
Edit/ Copy, Paste after current frame.
Press Shift+Ctrl+L until you have a total of 16 frames
Or as many frames as your chosen animation has.
Edit/ Select all.
9. Open your chosen animation.
Edit/ Select all, Edit/ Copy
Go back to your working image,
Be sure all are still selected.
Edit/ Paste into selcted frames.
Click View/ Animation.
If you don't like it, undo and re paste into selected frames
and move your mouse before pasting so it's in a different position.
Placing an animation is always trial and error so don't worry if it takes a few attempts.
10. Go back to paintshop.
Activate PSP 2. Copy,
Back to Animation Shop and paste as a new animation.
Edit/ Copy, Paste after current frame.
Press Shift+Ctrl+L until you have a total of 16 frames
Or as many frames as your chosen animation has.
Edit/ Select all.
On working image, Edit/ paste into selected frames.
Be sure it lines up before placing.
File/ Optimiazation wizard
Customize then follow the screen shots for my settings.

You may need to adjust these setting depedning on your tube
but these are what I have used for this particular anamtion.
11. In animation shop Edit/ Select all,
Crop your signature animation so it is
roughly 150 x 150
Animation/ re-size settings.
Resize to 150 x 150 (untab the ratio)
Create your copyright and initial in paintshop.
Copy and back in animation shop paste as a new animtaion.
Edit/ copy.
Activate your avatar.
Edit/ select all, edit/ propogate paste, Edit/ paste into selected frame.
Save as your avatar.


Forever Love 2
Tutorial written by and © to Bits N Bobs 31st January 2018.
Results are for personal use only.
No monetry gain allowed and that includes placing them behind a paid or donation based membership area.
You may add a link for this tutorial on your forum etc.
You are not allowed to share/forward or translate any of my tutorials or place them on any blog, website, DVD or anywhere else without my permission.
These tutorials are written from my own ideas and any similarities to any other tutorial is purely coincidental.
All tutorials are for those with a working knowledge of paintshop pro.
I reserve the right to amend these terms at any time.
Supplies needed.
Font of choice for your name.
I am using Daily grind
Tube of choice.
I am using Cupids Bow by Bits N Bobs available here
Tube is not to be used without copyright credit
Masks of choice.
I am using Vix_Mask363 by Vix available here
Scrap kit Forever Love here by Bits N Bobs
I am using Paper 10 and Elements 2, 9, 12, 68, 71, 72, 73, 74, 77,
Plugins required (optional)
Plugin - Penta.com dot and cross ( Garbage collection)
Note
This tutorial was written in PSP 9 and
uses animation shop 3 for animation.
Open all supplies in paintshop except the font.
Double click on your font and minimize.
Add your mask to your mask folder.
Open a new image 600 X 600 at 72 dpi
1. Activate and copy paper 10.
Activate your working image.
Edit/ paste as a new layer.
Layers/ Load/Save mask, Load mask from Disk,
scroll through and select your mask.
Tab Source Luminance, Fit to canvas, hide all mask.

Layers/ merge/ merge group.
Effects/ plugins/ penta.com/ Dots and cross
Amount:72 Cross distance:10 Cross width:2

Layers/ merge/ merge visible.
2. Copy element 68.
Paste as a new layer.
Image/ re-size to 500 pixels wide,
all layers un-tabbed.
3. Copy and paste your tube.
Image/ re-size to 400 pixels wide,
all layers un-tabbed.
Cut away below the knees.
Position towards the left.
Activate your frame layer.
Selections/ select all,
Selections/ float,
Selections/ defloat,
Activate your tube layer,
use your eraser to cut away your tube on the frame bottom.
Activate your tube layer,
Selections/ select none.
Now erase the rest of her legs at the bottom.
Add a dropshadow of choice to both layers.
I have used V3 H3 O40 B7 Colour #000000

4. Activate your bottom layer.
Copy element 71.
Paste as a new layer.
Image/ re-size to 350 pixels wide,
all layers un-tabbed.
Position towards the top left.
Layers/ duplicate, Image/ mirror.
Layers/ merge down.
Layers/ duplicate,
Position towards the bottom right.
Layers/ merge down.
Add your drop shadow.
5. Activate your bottom layer.
Copy element 74.
Paste as a new layer.
Image/ re-size to 180 pixels high,
all layers un-tabbed.
Position towards the right
Add your drop shadow.
6. Copy element 12.
Paste as a new layer.
Image/ re-size to 340 pixels wide,
all layers un-tabbed.
Position towards the bottom left corner.
Add your drop shadow.
7. Copy element 73.
Paste as a new layer.
Image/ re-size to 180 pixels wide,
all layers un-tabbed.
Position towards the bottom right corner.
Add your drop shadow.
8. Copy element 77.
Paste as a new layer.
Image/ re-size to 150 pixels wide,
all layers un-tabbed.
Position towards the bottom.
Add your drop shadow.
9. Copy element 72.
Paste as a new layer.
Image/ re-size to 150 pixels wide,
all layers un-tabbed.
Position towards the top right corner.
Add your drop shadow.
10. Copy element 2.
Paste as a new layer.
Image/ re-size to 300 pixels wide,
all layers un-tabbed.
Position towards the bottom.
Add your drop shadow.
11. Copy element 9.
Paste as a new layer.
Image/ re-size to 150 pixels wide,
all layers un-tabbed.
Position towards the top left corner.
Activate and use your raster deform tool to turn your element.
Layers/ duplicate, Image/ mirror,
position towards the right side middle.
Layers/ merge/ merge down.
Add your drop shadow.
12. Add all copyright info.
Export and save as a transparent png
Matching AV
13. For a matching AV open a new image
180 x 180 and 72 dpi.
Copy your tag and paste as a new layer.
Position to your liking.
Add copyright info and name,
export as jpg and save.


A darker love
Tutorial written by copyrighted to Bits N Bobs February 7th 2013
Results are for personal use only.
No monetry gain allowed and that includes placing them behind a paid or donation based membership area.
You are not allowed to share/forward or translate any of my tutorials or place them on any blog, website, DVD or anywhere else without my permission.
These tutorials are written from my own ideas and any similarities to any other tutorial is purely coincidental.
All tutorials are for those with a working knowledge of paintshop pro.
I reserve the right to amend these terms at any time.
Supplies needed.
Font of choice for your name.
I am using Alice in wonderland
Tube of choice.
I am using Temptress By Bits N Bobs
Tube is not to be used without the correct licence
Scraps of choice I am using Gothic Fantasy by Bits N Bobs
Scraps I am using are .....
Paper3, GF35, GF64, GF70
Plugins
Alienskin xenofex2 - Shatter
Note
This tutorial was written in PSP 9
Open all supplies in paintshop except the font.
Double click on your font and minimize.
Open a new image, 600 w x 250 h at 72 dpi.
1. Copy your paper and paste as a new layer.
Layers/ merge/ merge visible.
Copy your main tube.
Paste as a new layer.
Image/ re-size 70%
Position on the far right.
Change the layer blend mode to Luminance Legacy.
2. Copy GF64, paste as a new layer.
Re-size 60% all layers un-tabbed.
Place on the far right hand side.
Add a drop shadow of choice.
I am using V3 - H5 - O70 - B9.00 - C #000000
3. Copy GF70, paste as a new layer.
Re-size 70% all layers un-tabbed.
Place in the bottom right corner.
Add a drop shadow of choice.
4. Copy GF35, paste as a new layer.
Image/ rotate/ free rotate 90 left all layers un-tabbed.
Re-size 50% all layers un-tabbed.
Position towards the right hand side.
5. Copy your main tube.
Paste as a new layer.
Position so it's only her bottom half in view.
Place in the center on the left.
Effects/ plugins/ Alienskin xenofex2/ Shattered
See screenshot below for settings.
Layers/ arrange/ move down

6. Copy your main tube.
Paste as a new layer.
Image/ re-size 60%
Position on the left to your liking.
Add a drop shadow of choice.
Add a new raster layer.
Add your copyright info and name.
File export and save.
7. For your avatar open a new image,
180 x 180 at 72 dpi.
Copy your tag, paste as a new layer.
Position to your liking.
Layers/ new raster layers.
Add your copyright info, initial and then save.

Tutorial written by and © to Bits N Bobs 14th January 2011.
Results are for personal use only.
No monetry gain allowed and that includes placing them behind a paid or donation based membership area.
You are not allowed to share/forward or translate any of my tutorials or place them on any blog, website, DVD or anywhere else without my permission.
These tutorials are written from my own ideas and any similarities to any other tutorial is purely coincidental.
All tutorials are for those with a working knowledge of paintshop pro.
I reserve the right to amend these terms at any time.
Supplies needed.
Font of choice for your name and text.
I am using Chartrand
Tube of choice.
I am using a tube called Sexy Trouble from Ismael Rac
Tubes are not to be used without the correct licence
Mask 341 by Vix http://vixpsp.webs.com/
Kit - Red Hot Valentine by Artmama
Items I have used from this kit are...
paper 1, Embellie 38, Embellie 50, Embellie 4, embellie 18
Note
This tutorial was written in PSP 9
Open all the supplies in paintshop except the font.
Double click on your font and minimize.
1. Open a new image 500 wide x 500 high at 72 dpi
Re-size your paper to 450 pixels wide.
Copy and paste as a new layer.
Layers/ load/save mask/ Load mask from disk,
Look for mask Vix_Mask341 and load with the settings in the screen shot below.
Layers/ merge/ merge group

2. Re-size embellie 38 to 350 pixels wide.
Copy and paste as a new layer.
Select the inside using your magic wand.
Selections/ modify/ expand by 5.
Layers/ new raster layer, copy your paper, paste into selection.
Layers /arrange/ move down.
Effects/ texture effect/ Mosaic Antique settings as in screen shot below

3. Activate your top layer.
Sections/ select none.
Add a drop shadow of choice.
My settings will remain the same throughout.
V3, H3, O100, B9.0, C #000000
4. Re-size embellie 50 to 300 pixels high.
Copy, paste as a new layer and position to your liking.
Add drop shadow.
5. Re-size embellie 4 to 65 pixels high.
Copy, paste as a new layer and position to the top
of the previous embellie.
Add drop shadow.
6. Re-size embellie 18 to 200 pixels high.
Copy, paste as a new layer and position to your liking.
Layers/ arrange/ send to bottom.
Layers / duplicate, Image/ mirror.
Position to your liking.
Layers/ merge/ merge down.
Add a drop shadow.
7. Activate your paper layer.
Copy your tube ( I am using the medium sized one),
paste as a new layer, position to your liking.
Change the layers blend mode to Luminance ( Legacy)
then lower the layer opacity to 32%.
8. Activate your top layer.
Re-size your full body tube to 450 pixels high,
copy, paste as a new layer.
Image/ mirror, position to your liking and add a drop shadow.
9. Layers/ merge/ merge visible.
Add all copyright info and your name, export as a transparent png file and save.
Stores

BNB Blinkie