


Forever Love
Tutorial written by and © to Bits N Bobs 29th January 2018.
Results are for personal use only.
No monetry gain allowed and that includes placing them behind a paid or donation based membership area.
You may add a link for this tutorial on your forum etc.
You are not allowed to share/forward or translate any of my tutorials or place them on any blog, website, DVD or anywhere else without my permission.
These tutorials are written from my own ideas and any similarities to any other tutorial is purely coincidental.
All tutorials are for those with a working knowledge of paintshop pro.
I reserve the right to amend these terms at any time.
Supplies needed.
Font of choice for your name.
I am using Midnight Legend http://www.dafont.com/midnight-legend.font
Tube of choice.
I am using the one from the kit by Bits N Bobs available here
Mask of choice.
I am using Vix_Mask448 by Vix available in the supplies file
Scrap kit Forever Love by Bits N Bobs
Plugins required (optional)
Plugin - Penta.com dot and cross ( Garbage collection)
Note
Download extra supplies here
This tutorial was written in PSP 9 and
uses animation shop 3 for animation.
Open all supplies in paintshop except the font.
Double click on your font and minimize.
Add your mask to your mask folder.
Open a new image 600 X 250 at 72 dpi
1. Activate and copy paper 8.
Activate your working image.
Edit/ paste as a new layer.
Activate and copy paper 9.
Activate your working image.
Edit/ paste as a new layer.
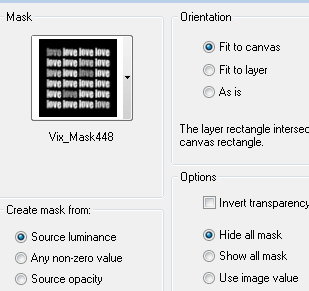
Layers/ Load/Save mask, Load mask from Disk,
scroll through and select your mask.
Tab Source Luminance, Fit to canvas, hide all mask.
Layers/ merge/ merge group.
Effects/ plugins/ penta.com/ Dots and cross
Amount:72 Cross distance:10 Cross width:2

Layers/ merge/ merge visible.
2. Copy element 71.
Paste as a new layer.
Image/ re-size to 500 pixels wide,
all layers un-tabbed.
Add a dropshadow of choice.
I have used V3 H3 O40 B7 Colour #000000

3. Copy element 3.
Paste as a new layer.
Image/ re-size to 250 pixels wide,
all layers un-tabbed.
Position to the top left corner
Add your drop shadow.
4. Copy element 7.
Paste as a new layer.
Image/ re-size to 150 pixels wide,
all layers un-tabbed.
Position to the bottom left corner
Add your drop shadow.
5. Copy element 72.
Paste as a new layer.
Image/ re-size to 100 pixels wide,
all layers un-tabbed.
Position towards the top
Add your drop shadow.
6. Copy element 12.
Paste as a new layer.
Image/ re-size to 240 pixels wide,
all layers un-tabbed.
Position towards the bottom
Add your drop shadow.
7. Copy your tube (element 80).
Paste as a new layer.
Image/ re-size to 400 pixels wide,
all layers un-tabbed.
Position towards the bottom right corner
Add your drop shadow.
Layers/ merge/ merge visible.
Adjust/ sharpness/ sharpen
8. Layers/ new raster layer.
Click on your forground pallette and pick a
colour from your tag for your border.
I have chosen #7bc4c2
Floodfill with your chosen colour.
Selections/ select all, Selections/ float, Selections/ defloat
Selections/ modify/ contract by 5
Edit/ cut, Selections/ select none.
9. Add all copyright info.
Export and save as a jpg
Matching AV
10. For a matching AV open a new image
180 x 180 and 72 dpi.
Copy your tag and paste as a new layer.
Position to your liking.
Layers/ new raster layer
Floodfill with your chosen colour.
Selections/ select all, Selections/ float, Selections/ defloat
Selections/ modify/ contract by 3
Edit/ cut, Selections/ select none.
Add copyright info and name,
export as before and save.
Stores


BNB Blinkie


0 comments:
Post a Comment